

Preparation is Key: Surface Readiness for Stair Nosing
Starting off right is crucial when installing stair nosing. The first step is to prep your surface. Ensure each step is as smooth as glass, sturdy like a fortress, and spotless. Dust and dirt can sabotage your stair nosing installation, so sweep, vacuum, or use a damp cloth to clean. If there are any rough spots or damage, sand them down or repair them before proceeding.
Understanding the Materials:
Before you begin, it’s important to understand the materials you’re working with. Different types of stair nosing require different approaches. For instance, metal nosing might require different adhesives or fasteners compared to plastic or wood. Make sure you’re familiar with the product specifications and have the right tools for the job.
Tools and Equipment:
Having the right tools is as important as having the right materials. For cutting stair nosing, a fine-toothed handsaw or a power miter saw can provide clean, accurate cuts. For adhesives, a caulking gun can help apply the adhesive evenly. A level and a spirit level are also essential for ensuring that your nosing is straight and even.
Riser Material First:
1. The Right Order for Installation
The riser material is the unsung hero of your stair nosing project. Installing it first sets the stage for a successful installation. Cut the riser material so it’s perfectly aligned with the tread. This might involve some trial and error to get the perfect fit, especially if your stairs have unique shapes or angles.
2. Precision Cutting: Tailoring Stair Nosing to Fit
When it comes to cutting stair nosing to size, precision is everything. Use a measuring tape and a good quality saw or cutter to ensure a clean, accurate cut. Remember, it’s better to start with a slightly longer piece and trim it down than to cut too much and end up with a piece that’s too short.
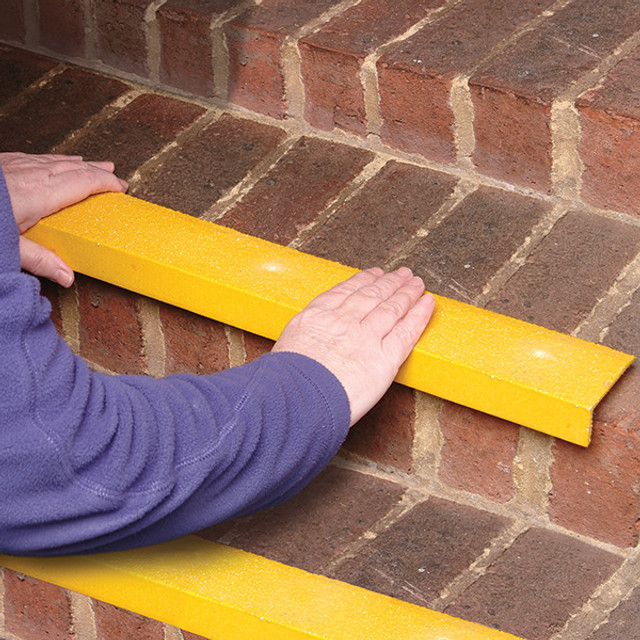
3. Secure Fit: Combining Screws and Glue for Stability
Attaching your stair nosing is where the rubber meets the road. Use a high-quality adhesive that’s suitable for the material of your stairs and nosing. Apply it evenly and press the nosing firmly into place. For added security, use screws at key points. This combination of glue and screws will ensure your stair nosing stays put.
4. Patience Pays Off: The Importance of Adequate Curing Time
Adhesives need time to cure and bond properly. Rushing this step can lead to a less secure installation. Depending on the adhesive, you might need to wait an hour or two. While you wait, you can clean up your workspace or prepare for the next steps of your project.
5. Clean Finish: The Final Touches for Flawless Installation
A clean finish is the icing on the cake of your stair nosing installation. Use a putty knife or scraper to remove any excess adhesive while it’s still wet. Once everything is dry, you can do a final inspection to make sure everything is in place and looking good.
6. Troubleshooting:
If you encounter issues such as uneven adhesive application or misaligned nosing, don’t fret. Gently remove the nosing and reapply the adhesive, taking extra care to ensure even distribution and correct alignment. If the nosing is damaged during installation, it may be necessary to replace it with a new piece.
Maintaining Your Stair Nosing:
Once installed, your stair nosing will require some care to keep it looking its best. Regular cleaning with a mild detergent and a soft cloth can help maintain its appearance. Avoid using harsh chemicals or abrasive tools that could damage the nosing.
Safety Regulations:
It’s important to comply with local building codes and safety regulations when installing stair nosing. This not only ensures the safety of the users but also helps in maintaining the structural integrity of the stairs.
The Benefits of Proper Installation:
Properly installed stair nosing not only enhances the aesthetic appeal of your stairs but also provides a safer walking surface. It can prevent accidents by reducing the risk of slips and falls, especially on stairs with worn edges.
Conclusion:
With these 6 essential stair nosing installation tips, you’re well on your way to a safer and more stylish staircase. By following these expert guidelines, you can ensure a professional and secure installation that will enhance the functionality and appearance of your stairs for years to come. Remember, the key to a successful project is preparation, precision, and patience.

About The Author
Meet Kevin, a seasoned expert in the field of architectural safety and design with over 12 years of experience. As a leading authority on stair safety solutions, Kevin has dedicated their career to exploring and implementing innovative and effective stair nosing applications.